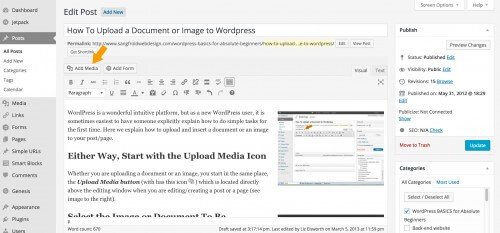
Either Way, Start with the Upload Media Icon
Whether you are uploading a document or an image, you start in the same place, the Upload Media button (which has this icon 
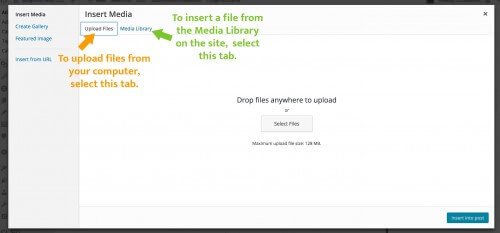
Select the Image or Document To Be Uploaded

Inserting Images Into a Post/Page
When the media you uploaded is an image, you will see the details pertaining to image files displayed in the Add Media pop up. These details include:
- Title: The title is no longer required but may be filled in with a default value. You can change it to be whatever you want, but we currently recommend leaving it blank to best meet HTML5 Standards.
- Alternate Text:Alt text for the image, e.g. “The Mona Lisa”. The Alt Text field should be used to describe the image that is being inserted. This text is used by Reading Software to describe the image to users. You should try to make the Alt text both descriptive and contain meaningful keywords where possible to enhance Search Engine Optimization.
- Caption: Caption if needed
- Description:Additional additional longer descriptive information about the image if necessary.
- Link To: The Link To field allows you to select if you want to link the image to a URL. The options in the dropdown are to link to the Media File (URL of the full-size image), the URL to the Attachment page for the image (seldom applicable), to a Custom URL or to nothing.
- Alignment: None, Left, Center, Right – Choose how you want the image to align on the page.
- Size: Thumbnail, Medium, Large, Full Size – Choose the size of the image you want to insert. The maximum sizes for these default values can be edited by going to Settings > Media. After inserting an image, you can change the size of the image just by ‘grabbing’ the corner of the image and adjusting it visually to the size you like.
Fill in the fields as needed and click the Insert into Page/Post button.
The video below about Editing pages in WordPress contains a brief section on adding images.
Inserting PDF Files or Documents into a Post or Page
When the media you uploaded is a document, you will see the details pertaining to document files displayed in the Insert Media pop up. It looks pretty much the same as the pop up for inserting an image with minor differences in the details that can be filled in. These details include:
- Title: This field will be filled in automatically by WordPress, but you can change it to whatever you want. NOTE: When you click ‘Insert into Post’, the title is what will appear on the page with a link to the document. **See our video below that shows a shortcut for inserting PDF Documents and linking to them.
- Caption: I honestly do not know why a caption is needed for a document, so I never fill this in. I think it is just displayed by default.
- Description: Even when filled in for a document, this is not added to the markup when the document is inserted, so again I think this field is just displayed by default…..I always ignore it when dealing with documents.
- Link TO: This field can be set to link to the document file or to the Attachment page (seldom applicable).
Fill in the fields as needed and click the Insert into Page/Post button. NOTE: Sometimes it is easiest to just copy the URL directly to the file to your clipboard, then exit the pop up and create a link using whatever text you want. We demonstrate how to do this in the video below. ↓

